When we talk about point settings, we’re actually referring to what is known as
command settings for points. We provided a quick introduction to command settings in the first topic, so you know that all the settings that define the creation of Civil 3D objects are available as command settings in the Settings tab of Toolspace. As we discuss the creation and management of Civil 3D points, it is recommended to have the previously mentioned settings readily available for on-the-fly modifications. Whether or not the changes you make on the fly are remembered the next time you create points depends on your template settings.
To make sure that the settings you change hold every time you create points, follow these steps:
- On the Settings tab of Toolspace, locate the Point branch and click the plus sign to expand.
- Click the plus sign to expand Commands.
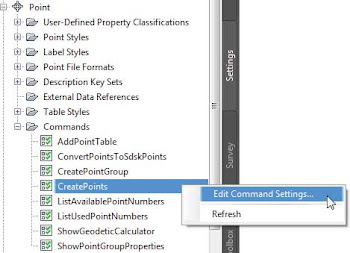
- As shown in the first screen in Figure 1, right-click the command CreatePoints and select Edit Command Settings.
 |  |
| Figure 1: In your Civil 3D template, make sure Save Command Changes To Settings is set to Yes for Points. |
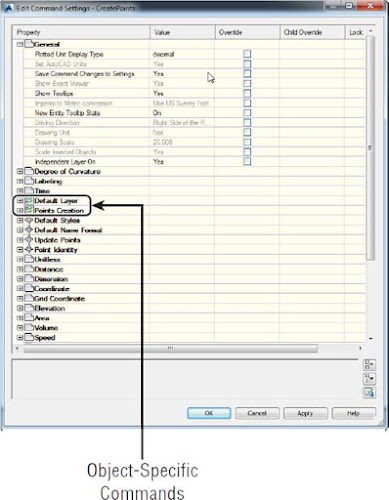
- Expand the General section and verify that Save Command Changes To Settings is set to Yes.You will notice that this change affects only the CreatePoints command. If you want to save the settings at the Point collection level for all the commands related to point creation, you will do that from the Edit Feature Settings option that can be selected when you right-click the Point collection.
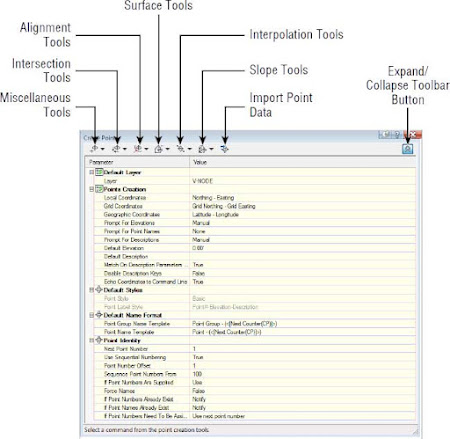
By setting the Save Command Changes To Settings option to Yes, you are ensuring that changes you make on the CreatePoints toolbar will be saved for the next time you use the command. If you explore the command settings further, you will see the options Default Layer and Points Creation. You will notice that these commands are represented with a different icon from the other settings. This is because these are object-specific command settings defined at the object level, while the others are defined as part of the overall drawing level within the Ambient Settings tab of the Drawing Settings. You will find a defined subset of the options available within the command settings in the Create Points toolbar.
To access the Create Points toolbar, follow these steps:
- Go to the Home tab of the ribbon.
- In the Create Ground Data panel, select Points ➢ Point Creation Tools.
- Expand the toolbar by clicking the chevron icon on the far-right side Figure 2.
 |
| Figure 2: Overview of the Create Points toolbar. |


