After creating a survey database to receive the data, the next step is to transfer the raw data into Civil 3D so that the analysis and mapping can begin. There are several ways to accomplish this, but in this discuss you’re going to do it the way a surveyor would do it. The process of importing data requires some important questions to be answered. For your first try, however, you’re going to accept all of the defaults and see what happens.
To import survey data into a drawing, follow these steps (
note that the previous exercise must be completed for this exercise to work properly):
- Open the drawing named Import Survey Data.dwg or (Import Survey Data.dwg (METRIC)) located in the Exercise_03 class data folder.
- On the Home tab of the ribbon, click Import Survey Data.
- Select the Essentials 1 survey database and click Next.
Tips:The Essentials 1 database is the result of correctly completing the previous exercise. This database is provided to ensure that you start the current exercise with the correct version. If no survey database existed, you could have created one by clicking Create New Survey Database.
- Under Data Source Type, select Point File.
- Click the plus icon under Selected Files, and browse to the Exercise_03 class data folder.
- For Files Of Type, select the Text/Template/Extract File (*.txt) option. Then select Topo Survey.txt and click Open.
- Under Specify Point File Format, select PNEZD (comma delimited).
Tips :PNEZD represents the order of the data columns in the text file: Point number, Northing, Easting, Z coordinate (elevation), and Description.
- Click Next. In the Specify Network dialog box, note that <none> is selected for the current network. Click Next.
- In the Import Options dialog box, check the boxes next to Process Linework During Import and Insert Survey Points.
- Verify that Current Figure Prefix Database and Current Linework Code Set are both set to Sample.
What Is a Network?
Surveying is a complicated business. For some surveying projects, key measurements are related to one another so that accuracy can be adjusted across the entire project simultaneously. The network is the way of setting up these relationships and performing accuracy adjustments. The survey data used in this exercise is a simple form that does not contain any of these relationships; therefore no network is needed.
Survey Data Sources
Survey data can come in several forms, depending on the hardware and/or software utilized to create it. Here are a few of the most common forms:
Field Book File
This is considered a legacy format unique to Autodesk products such as Land Desktop and older versions of Civil 3D. Many surveyors have moved on from field book files, but have done so fairly recently. For that reason, you might still find them to be quite common. One difference with field book files is that they can store the measurements exactly as they were taken in the field. The other formats listed here contain points that have been reduced to coordinates.
LandXML File
Many civil engineering and surveying programs can export data in the form of LandXML, including Civil 3D. This nonproprietary format enables data to be exchanged between programs created by different software companies.
Point File
The point file is probably the most generic and universally accepted way of delivering point data. This type of file is plain text and can be opened in a program like Microsoft Notepad. Regardless of age, cost, or origin, nearly all surveying and civil engineering programs are capable of producing this type of file.
Points from Drawing
With this option, you can open a drawing that already contains points and add them to your survey database. Remember that the survey database is stored outside the drawing, so the points you see in the drawing are a representation of what is stored there.
- Click Finish.
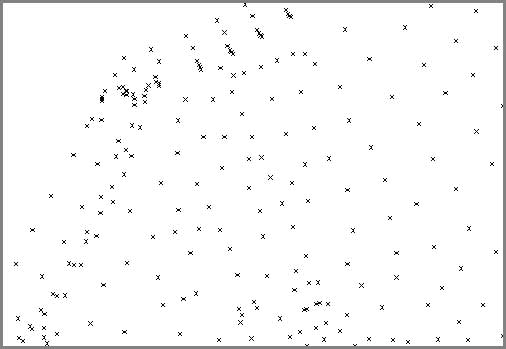
- Zoom in to the drawing, and examine what you see (see Figure). You may need to execute the Zoom Extents command to bring the points into view. This can be done by typing ZE at the command line and pressing Enter.
 |
| So far, importing data shows only a bunch of relatively meaningless x markers in the drawing. |
Importing Points without a Survey Database
Sometimes you may want to import points straight into your Civil 3D drawing without the extended data management capabilities of the survey database. You can do this using the Points From File command on the Insert tab of the ribbon, as shown in the following illustration:
The resulting dialog box (shown below) provides only one choice for file format, a text file, and no association with a survey database or linework code is set.
The differences continue as you work with the points you've imported. Points created without the management of the survey database are easily edited. You will find that points created using the Points From File command can be moved as easily as moving a circle or a polyline. They can also be freely edited using the Properties window. Using the Points From File function is definitely quicker and simpler than using the Import Survey Data command; however, there are considerable differences in functionality. When you choose which method to use, be sure to consider the level of protection, ease of editing, ability to generate linework, and interrelationship between points and survey measurements. Each method serves a different purpose and should be chosen appropriately.


