
The Mapcheck report computes closure based on line, curve, or parcel segment labels, as you’ll see in the following exercise:
- Open the 0206_Mapcheck.dwg or (0206_Mapcheck_METRIC.dwg) file.
- Change to the Survey tab of the ribbon, and select Mapcheck from the Analyze panel to display the Mapcheck Analysis palette.
- Click the New Mapcheck button at the top of the menu bar.
- At the Enter name of mapcheck: prompt, type Record Deed and press Enter.
- At the Specify point of beginning (POB): prompt, choose the north endpoint of the line representing the east line of the parcel (the longest line in the file).A red glyph will appear to represent the POB.
- Working clockwise, select each parcel label one at a time.Be sure not to skip the small segment in the southwest portion of the site.In the northwest portion of the site, you will encounter a label whose bearing is flipped. Before selecting the last segment, you will use the Mapcheck Reverse command to fix this in your Mapcheck report.
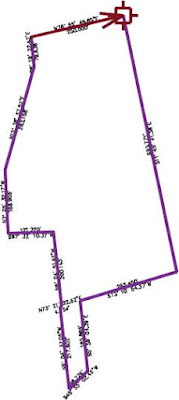
- At the Select a label or [Clear/Flip/New/Reverse]: prompt, type R and then press ↲ to reverse direction.The Mapcheck glyph will now appear in the correct location along the segment, as shown in Figure 1.
 |
| Figure 1: The Mapcheck glyph verifies that your input is correct. |
- Select the last line label along the north section of the parcel.
- Press ↲ to complete the Mapcheck entry.The completed parcel should have 12 sides.
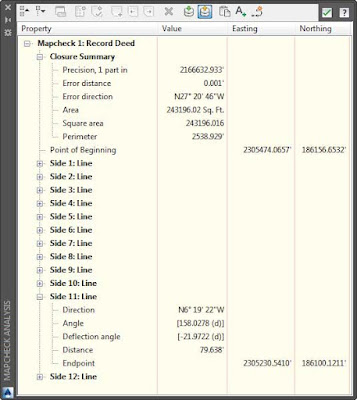
- Select the output view as shown in Figure 2 to verify closure.
 |
| Figure 2: The completed deed in the Mapcheck Analysis palette. |

 The Mapcheck report computes closure based on line, curve, or parcel segment labels, as you’ll see in the following exercise:


