You are never stuck with a COGO point’s elevation. It can be changed individually or as a group using the Panorama window. Additional tools are available for manipulating points (see Figure 1) in the COGO Points contextual tab that opens when you select a point object.
 |
| Figure 1: Point-editing commands in the ribbon. |
 |
 |
| Figure 2: Hydrant Points as placed (top); hydrant points moved up to surface elevation (bottom) |
- Right-click the name of the point group in Prospector and select Edit Points.Panorama will appear for your point-editing delight.
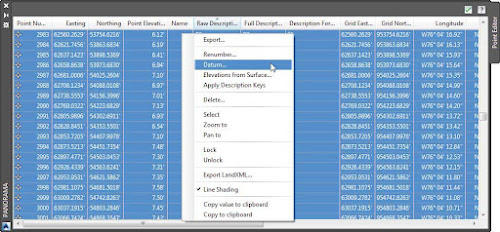
- Use Windows keyboard tricks to control which points are selected for modification.Pressing Ctrl+A will select all points in the Panorama listing, as shown in Figure 3.

Figure 3: Right-click to access point-modification tools from Panorama. - When you have finished selecting points, right-click and choose Datum.The command line will prompt you to specify the change in elevation you require.
===o0o===
- Graphic Point Edits
- Panorama and Prospector Point Edits
- Point Groups
- Changing Point Elevations
