Structure – Square Grip – Plan ViewThis grip changes the location of the structure without changing its rotation. As a structure is moved, the ends of any pipes that connect to it will move with it.

Structure – Circular Grip – Plan ViewThis grip changes the rotation of the structure without changing its location.

Structure – Top Triangular Grip – Profile ViewThis grip changes the elevation of the top of the structure. Use caution when editing the top of a structure because, depending on its properties, the software may automatically reset it to match a surface.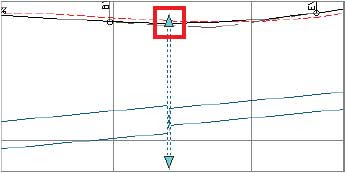

Structure – Bottom Triangular Grip – Profile ViewThis grip changes the elevation of the sump (inside floor) of the structure. This elevation cannot be placed above the invert (bottom of the inside wall) of the lowest incoming pipe.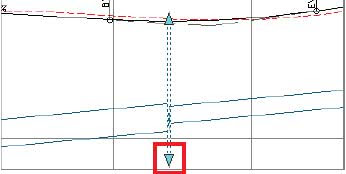

Pipe Midpoint – Triangle Grip – Plan ViewThis grip is used to change the diameter of a pipe. Dragging it away from the pipe increases the diameter, and dragging it toward the pipe decreases the diameter. This grip can be used in conjunction with the AutoCAD Dynamic Input feature to view the diameter or even type it in.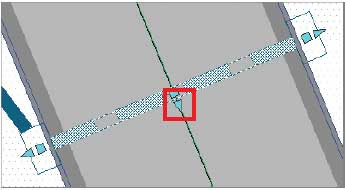

Pipe Midpoint – Square Grip – Plan ViewThis grip moves the pipe to a new location without changing its angle or its slope.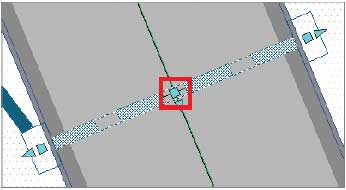

Pipe Endpoint – Square Grip – Plan ViewThis grip moves the location of one end of the pipe while keeping the other end fixed. In profile view, it maintains the current elevation of that end of the pipe.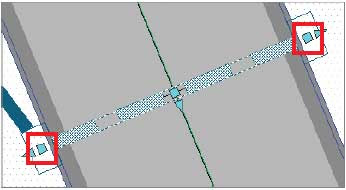

Pipe Endpoint – Triangular Grip – Plan ViewThis grip changes the length of the pipe while maintaining the angle of the pipe and the location of the opposite end.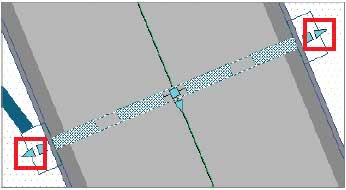

Pipe Endpoint Grips – Profile ViewThese grips change the elevation of a pipe at its endpoint. The diamond-shaped grip at the top sets the crown (top of the inside wall) elevation. The diamond-shaped grip at the bottom sets the invert (bottom of the inside wall) elevation. The triangular grip sets the centerline elevation. These grips can be used in conjunction with the AutoCAD Dynamic Input feature to view the elevation or even type it in. They do not change the horizontal location of the pipe’s endpoint.

Pipe Midpoint – Square Grip – Profile ViewThis grip changes the elevation of the pipe without changing its slope. It does not affect the location of the pipe in plan view.
You should note that when you change the location of the endpoint of a pipe in plan view, the structure connected to it does not move with it. To place the structure at the end of the pipe, you must move the structure as a separate action. If you do not update the location of the structure, the pipe may reset to match the structure at some point in the future.
To use grips to edit the pipes and structures in your drawing, follow these steps:
- Open the drawing named Editing Pipe Networks Using Grips.dwg located in the Chapter 14 class data folder.
- In the plan view on the left, zoom in to the inlets located at station 5+50 (0+170).
- Click both inlets to select them, and then click the circular grip on the inlet to the east.
- Click the square grip of the west inlet. This will rotate the east inlet to align it with the west inlet, which also aligns the east inlet with the curb.
- If it is not already turned on, click the Dynamic Input icon at the bottom of your screen to turn it on.
- Zoom in to the pipe at station 5+50 (0+170) and select it. Click the triangular grip at the midpoint of the pipe.
- Drag the grip away from the pipe, and click when the dynamic input text box reads 1.5 (0.450). Or you can just type 1.5 (0.450) in the box, as shown in Figure 14.11. This changes the diameter of the pipe to 18 inches (450mm).
- In the bottom-right viewport, zoom in to the manhole located near the western corner of the Common Area. Click the manhole, and then click the square grip at its center.
- If your Osnap icon is turned off, click it to turn it on.
- Click the center of the red circle west of the manhole. If you watch carefully, you’ll see the position of the manhole change slightly in the profile view.
- Click within the top-right viewport, and then click the pipe within the Jordan Court profile view that is farthest to the left.
- Click the bottom diamond-shaped grip on the left end of the pipe, and then zoom out until you can see the dynamic view dimension and text box. Type 180 (54.864) in the text box, and press Enter.
- Click the Dynamic Input icon to turn off that feature, and then click the structure farthest to the left within the Jordan Court profile view.
- Click the triangle grip at the bottom of the structure, and drag it upward until a symbol appears that is a red circle with a slash through it (see Figure 14.12). Click while this symbol is visible. The sump elevation of the structure is raised slightly, but Civil 3D will not allow the sump to be placed above the lowest connecting pipe.
Tips:Step 4 will be easier if you press F3 to turn off running object snaps.
 |
| Figure 14.11 Using Dynamic Input to enter a pipe diameter value. |
 |
| Figure 14.12 Editing the sump elevation of a structure using grips. |
- Editing Pipe Networks Using Grips
- Editing Pipe Networks Using Editing Tools
- Editing Pipe Networks Using Properties
- Editing Pipe Networks Using the Pipe Network Vistas
